
3 Days in the Yosemite Backcountry + Summiting Half Dome

Summiting Half Dome was never on my to-do list. In fact, it was always quite the opposite—I actively avoided it. I love to gaze at Half Dome from the Valley floor, it is one of the most beautiful pieces of rock on the planet, but that’s where the love affair had always ended for me. Living in California and often visiting Yosemite Valley means you're likely familiar with the horror stories surrounding Half Dome. You'd hear about the nightmarish traffic jams on the cables, climbers freezing midway, getting trapped at the summit during a thunderstorm, and even the tragic falls and fatalities. It just never sounded appealing to me.
In 2023, I made a conscious effort to put myself out there more. The pandemic had a significant impact on my social circle, and before I knew it, my local friend group was seriously dwindling, we were still working from home, and it was all making me increasingly anti-social. During those three unusual years, many friends moved across the country, had babies, or developed new interests. I realized I was missing out on activities I wanted to do because I had no one with similar interests to join me. So, I decided to seek out a women's group backpacking trip in here in California.
I was pleasantly surprised to see there were actually a lot of great companies that offer women’s focused adventure programs like Alpinistas Adventures, Sierra Mountain Center, REI (sadly, no longer running trips) and Explorer Chick to name a few. Funny enough, many of these outfitters have Half Dome trips, which are quite popular, as it’s a great way to by-pass the difficult to get day-hike permits for Half Dome. And the more I read about them, the more they piqued my interest. Of course, my intention was to meet some outdoorsy, like-minded women and spend some good quality time in the backcountry, but a trip with a summit goal is always pretty fun too…
After weeks of debating with myself and sorting out the dates, I finally decided to join the REI Women’s Half Dome trip in July (sadly, no longer running trips). However, by the time I went to book it, the trip was already full. I was disappointed and reluctantly put myself on the waitlist, telling myself that if it was meant to be, it was meant to be. Sure enough, two weeks later, I received an email—a spot had opened up, and I was in! It was, in fact, meant to be.
Want to skip my personal story? Jump ahead to:
• How To Enter The Half Dome Permit Lottery
• What to Know Before You Go
• What to Pack for Hiking Half Dome
Day 01 - Backpacker’s Camp
The night before our first day, I went to Fresno and stayed at Holiday Inn for the night to get into the park early. Since the reservation system was removed in 2023, the park had become a bit chaotic, especially in July, with long lines at the entrance and parking areas in disarray. Wanting to avoid the crowds, I left Fresno around 6am, got to the park by 8am, but the Curry Village parking lot was already full.
Instead, I parked near El Capitan and spent the day by the Merced River, riding my bike around the Valley floor until it was time to meet my group at the Backpacker's Camp around 4 PM. Then, I moved my car to Curry Village and walked with my pack to the camp. Upon arrival, I was greeted by our guides and the rest of the group as they arrived one by one. We were assigned tent mates and given tents and additional gear to carry. We laid out our personal gear and re-packed our bags, ditching any last-minute items that suddenly felt unnecessary. As our guides prepared dinner, we sat in a circle, sharing where we were from, what we did for a living, and why we were there. Surprisingly, not a single person was from California, dashing my hopes of making a new local friend. However, it was fascinating that our group included people from all over—Oregon, Indiana, New York, and even India!
After dinner we set up our tents and hurried to bed. We had an early morning to pack up camp and catch a shuttle up to Glacier Point to officially start our trip.
Day 02 - Mono Meadows to Illilouette Creek
On day two, the adventure truly began. After waking up, we had breakfast, packed our lunches, and set off for the shuttle. Our first stop was Glacier Point, which was a relief since the road had only reopened the day before—a recurring theme throughout our trek. You see, the winter of 2023 was a severely heavy snow fall year, and this first week of July happened to be the week that the snow was FINALLY melting enough for roads and trails to open. However, as the snow was melting, it was revealing a lot of damage, so whether our planned routes would be traversable was going another story.

At Glacier Point, we took in the stunning views of the Valley, Vernal and Nevada Falls and of course Half Dome and could see most of our upcoming route from above. Then we headed back to the shuttle, and took off for Mono Meadows, an area of the park I have never seen before. The Mono Meadows trail is beautiful and lush winding you down towards Illilouette creek. Luckily, this first day was mostly downhill, truly easing us into what was to come in the days ahead. After just about 3.5 miles we set up camp at a quiet little spot near Illilouette Creek. Here we filtered water, made a small campfire and enjoyed a dinner of pasta and chicken—the perfect way to end our first day on the trail.

Day 03 - Illilouette Creek to Little Yosemite Valley
My second day on trail did not start well. I awoke with a migraine and in hopes of nipping it in the bud as quickly as possible, I took my prescribed medication I thankfully remembered to bring along. Now I don’t know if it was the mixture of medication and elevation, or if I just ate something weird, but only 5 minutes after waking up, I was running into the forest, digging a hole as fast as I could and violently throwing up. It only lasted a few minutes, and immediately after I felt so much better, but it did not feel like a good sign for the rest of the day.
Annnd, it wasn’t. This might have been the hardest day of all. We had to do a bit of rerouting thanks to the swollen, impassible creeks. Which was going to make day three a longer uphill battle. Regardless, it was still beautiful. Our first scenic stop along the way was Illilouette Falls. Yosemite does not disappoint in the waterfall department, that’s for sure.

After crossing the bridge over Illilouette Creek, the real challenge began. We encountered steep switchbacks leading up to Panorama Point in the heat of the day. I soon found myself in between the fast and slow groups, hiking alone. But to be honest, it was a nice reprieve—an opportunity to be alone with my thoughts while the views grew more expansive and breathtaking with each step higher.
Eventually, our entire group reconvened, and it was time to make a game plan. Initially, we had planned to attempt our Half Dome summit that evening, but the varying paces within the group made it clear that reaching the summit before sundown would be difficult. Some group members were disappointed and wanted to push on, but to me, the idea of summiting at sunrise sounded so much more magical. Knowing we could rest upon arriving at Little Yosemite Valley that evening was a relief, especially after the morning I had.


The views along this next section of the trail were truly stunning, offering deep glimpses into the valley and out towards Yosemite Falls. Eventually, we descended a few hundred feet and emerged at the top of Nevada Falls, a familiar spot from my Mist Trail hike years ago. It was the perfect place to stop for lunch, soak our feet, and enjoy the soothing sounds of the waterfall along with the breathtaking views from above.

From Nevada Falls, we had another 1.5 miles to reach Little Yosemite Valley, where we would camp for the night. This campground was a welcome relief compared to the previous night, as it offered the luxury of pit toilets and stunning views of the backside of Liberty Cap and Half Dome towering above us. The only downside to this particular campsite was the amount of mosquitos we had to contend with. I highly recommend a bug net and some strong mosquito repellent if you plan hike Yosemite in the summer months.
After eating a hardy meal and discussing our plans for the next day, we turned in especially early, setting our alarms for a 2am start for Half Dome.
Day 04 - Little Yosemite Valley to Half Dome
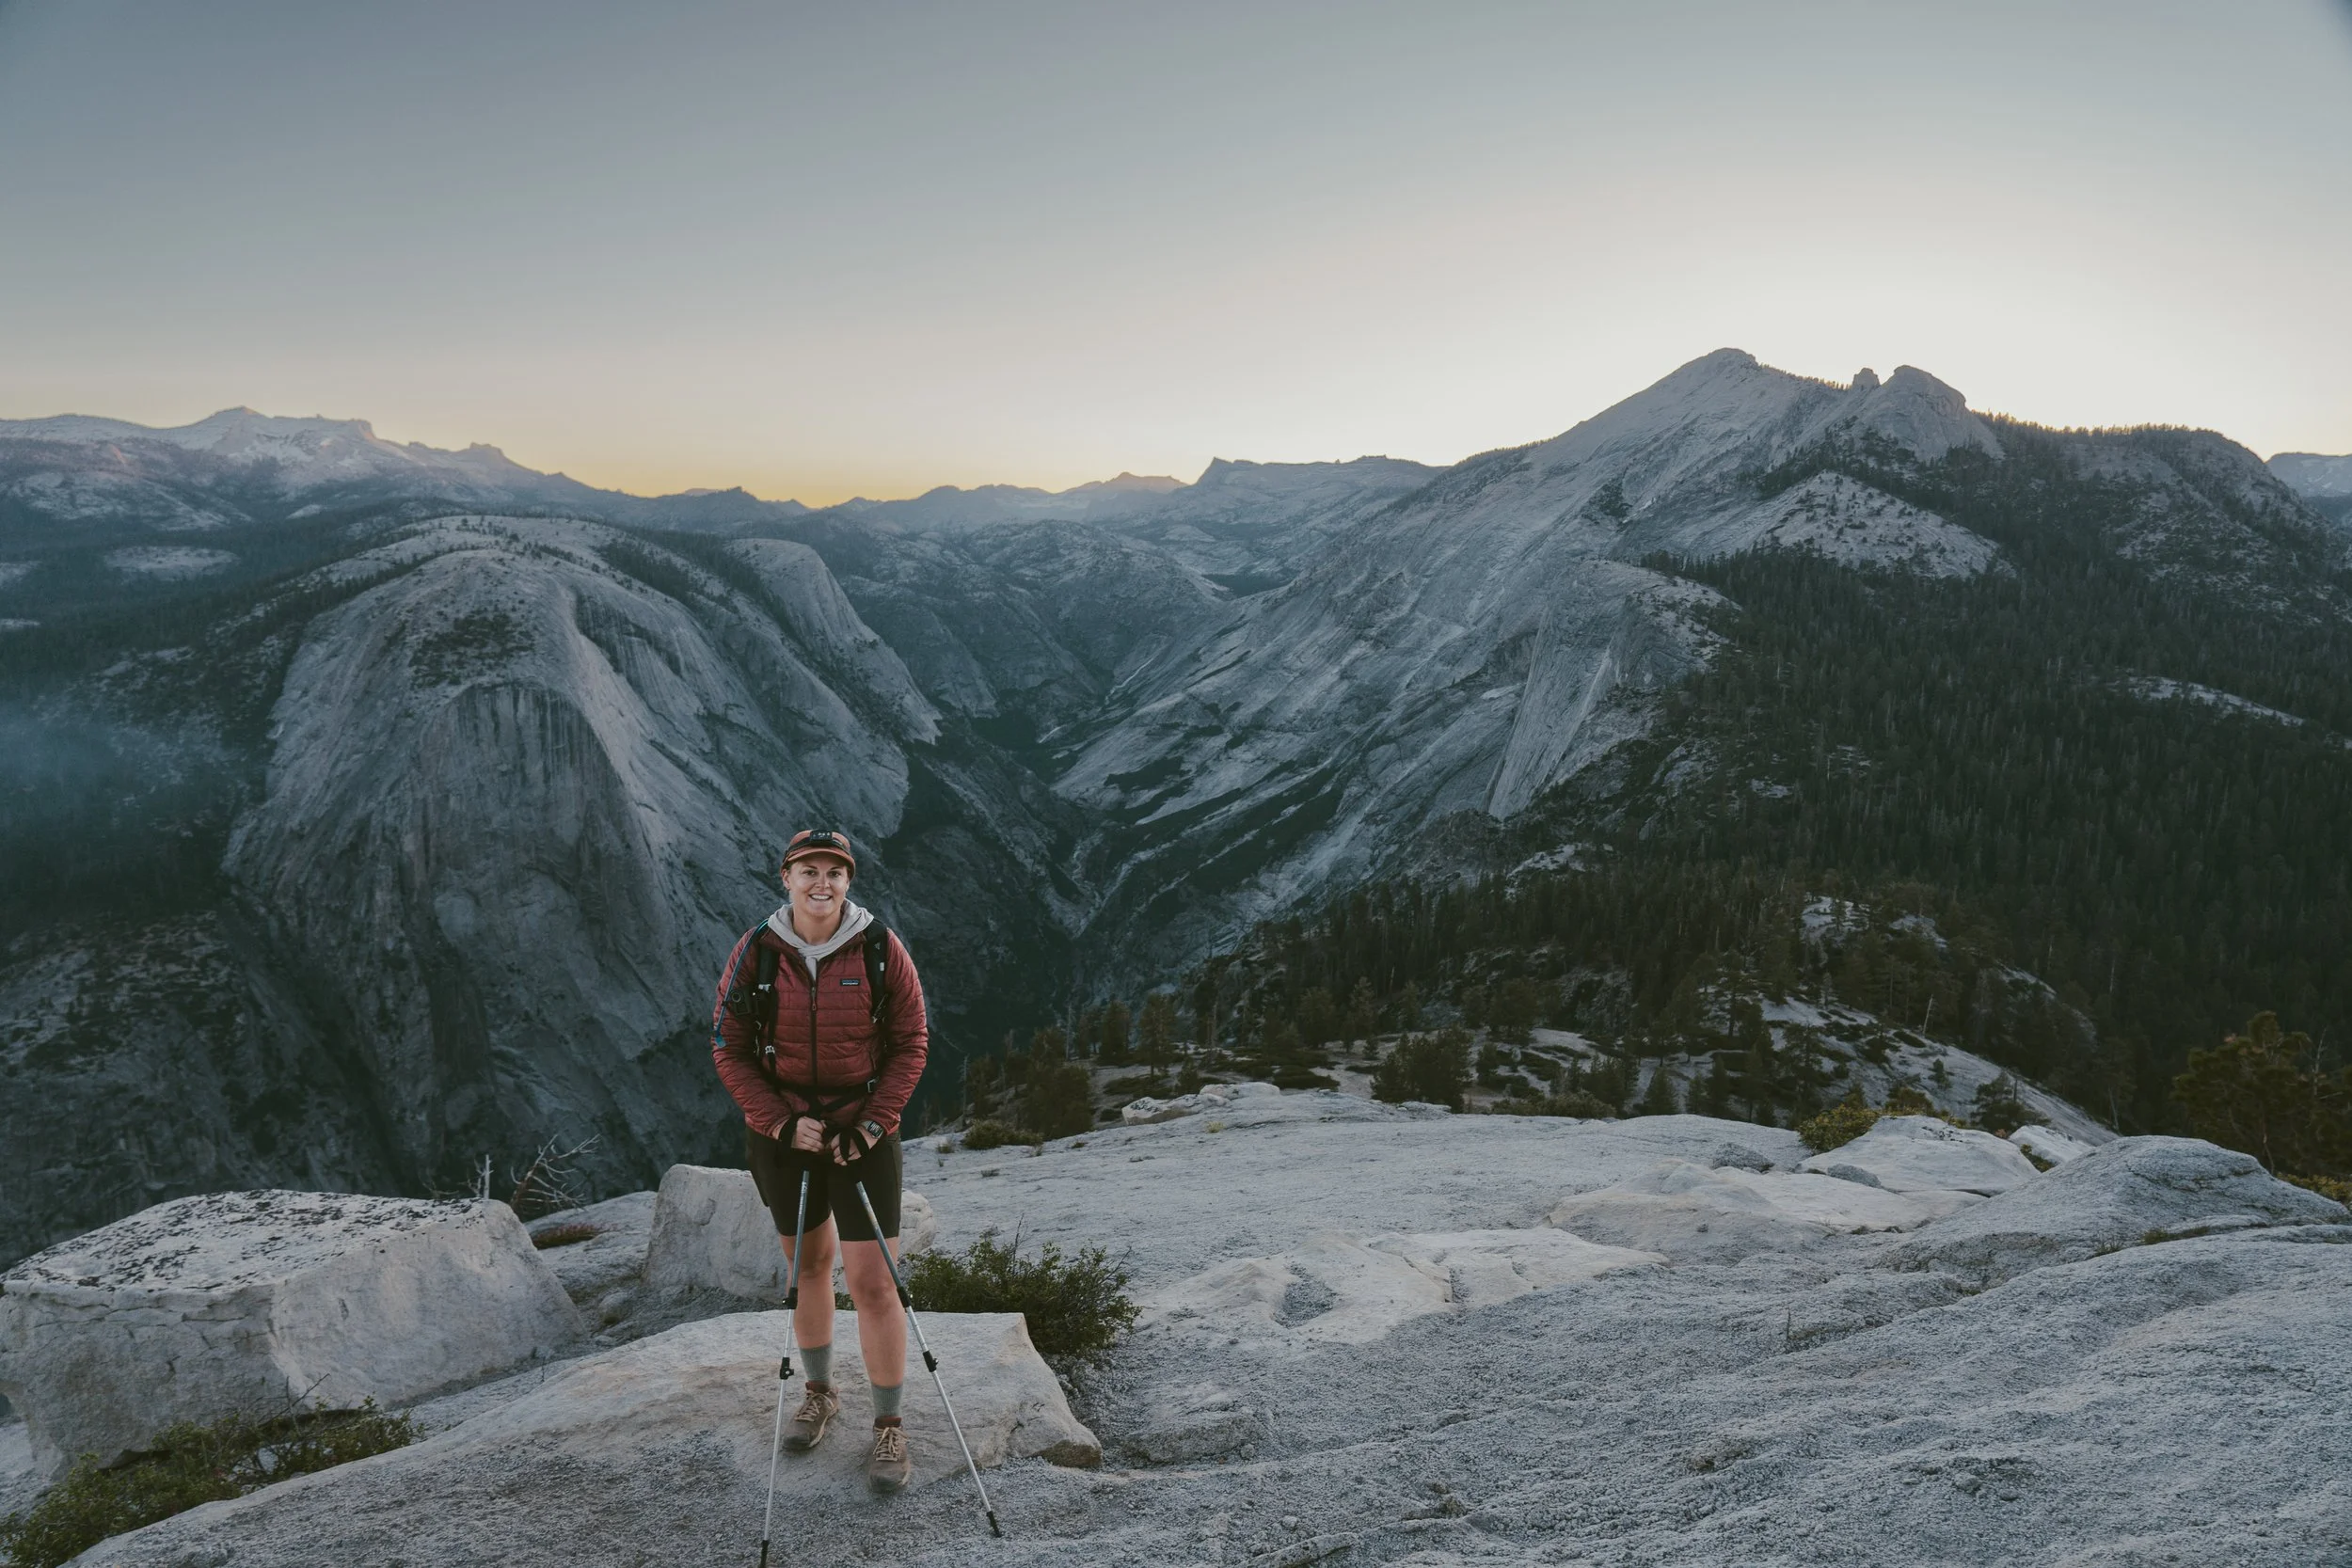
I'm not sure if any of us actually slept that night, but by 2 AM, we were up and ready, climbing towards the Sub Dome by the glow of our headlamps. From Little Yosemite Valley it’s another 3 miles and 2,000+ ft. of elevation gain to the base of Half Dome. We took our time, and as the sun started to peak over the horizon we reached the Sub Dome for some truly magical views.
Permits for hiking Half Dome in Yosemite National Park are typically reviewed at the base of the Sub Dome. This is where rangers or staff members check permits to ensure hikers have the required authorization to proceed to the cables leading to the summit of Half Dome. Once our permits were checked, we were finally on our way.
Ascending Sub Dome is a challenging feat, and reaching this point is already a significant accomplishment. The trail winds steeply up the hard, slick granite, and the elevation gain becomes more pronounced. As we ascended Sub Dome and approached Half Dome, a sense of unease settled in my stomach. Despite being typically fearless, seeing the steep incline and the cables up close sent shivers down my spine.

Around 7am, one by one, our group gathered at the top of Sub Dome, nervously giggling and quietly discussing what lay ahead. Our guides reviewed safety precautions and climbing techniques one last time, and we finalized our order of ascent. The best part of climbing the cables at sunrise is that hardly anyone else is on them at the same time, so we didn't have to navigate around other hikers or worry about traffic jams. It was just us and the quiet expanse of the dome.

Slowly but steadily, we navigated the slippery granite, placing one foot carefully in front of the other. Our group of ladies was incredibly supportive, constantly checking in on each other and offering encouragement. One unexpected challenge was the amount of arm strength required for the climb. There were moments when we paused for 30 seconds to a minute, waiting for others ahead to progress, and during these breaks, I could feel my arms trembling from the effort of supporting myself on the steep incline. In those moments, I was so glad I took my training regimen so seriously in the months beforehand.
I reached the summit of the cables around 7:45 AM and was overjoyed to find solid, albeit rocky, ground atop Half Dome. It was an emotional moment, especially after two days of backpacking, to stand on such an iconic landmark. I started to grasp the allure and obsession with conquering this monolith. The icing on the cake was achieving this feat with a group of incredibly strong, like-minded women who supported and motivated each other every step of the way.

After celebrating with high fives, taking photos, and quickly devouring instant oatmeal and coffee at the summit, reality set in: we still had to descend the cables—a task that can be even scarier than ascending. While climbing up is relatively straightforward, descending requires different techniques depending on your comfort level. And at this point in time, the cables were increasing in traffic as day-hikers made their way up from the Valley floor. Some opt to descend the cables facing forward, which provides a clear view of what lies ahead but can be dizzying and unnerving as you look down. Personally, I found this method a bit too daunting, feeling like I might pitch forward at any moment. Instead, I chose a hybrid approach, descending backwards while side-stepping. This position felt more secure to me, allowing me to manage the traffic coming up without difficulty.
I'll admit, descending felt like it dragged on forever. For most of the way down, all I could think about was how much I wanted to be off those cables and never think about them again. But at last, after what felt like an eternity, I stepped off the cables and could proudly say I had conquered Half Dome.
But even after all of that accomplishment, we still had a long day ahead of us. We had yet to descend the Sub Dome, hike back down to our campsite at LYV, break down the campsite, and haul all of our gear down the John Muir Trail (which may or may not have been open thanks to the snow melt?) to the Valley floor. It was safe to say, by the time we got down the Valley around 5pm, my feet were completely done, and all I could think about was finding an ice cold Diet Dr. Pepper and some Air Conditioning.
Now that I’ve told you my Half Dome story, here’s how to get started on creating your own…
How to Enter The Half Dome Permit Lottery
Booking a guided trip offers the advantage of having all logistics handled for you, eliminating the need to navigate the lottery or secure wilderness permits. However, guided trips can be expensive. Entering the Half Dome lottery on your own costs just $10 per application, and this fee is non-refundable. If you get a permit, you’ll pay an additional $10 per hiker. Yosemite wilderness permits are $10 each, plus an additional $10 per hiker for Half Dome permits. Whether you plan to hike Half Dome in a day or over a multi-day backpacking trip, continue reading for valuable tips.

TIPS TO INCREASE YOUR ODDS OF WINNING A HALF DOME HIKE PERMIT
Opt for weekdays, especially Tuesdays and Wednesdays, which typically have half the number of applicants compared to weekends.
Choose the shoulder season for your hike, such as late May, early June, September, and October, when there are fewer hikers compared to peak summer months (just remember, your days will be shorter, which means less time for hiking!)
If hiking with a group of 5 or 6 people, designate separate group leaders and alternates and submit multiple applications for the Half Dome lottery.
Consider backpacking the trail, as this not only breaks up the hike but also puts you in a different applicant pool for the traditional Half Dome lottery, which can be more competitive.
DAILY HALF DOME LOTTERY
If you miss out on a Half Dome hike permit in the pre-season lottery or decide on a spontaneous trip, there's another option: the daily lottery.
For the daily lottery, hopeful hikers can apply for a permit two days before their desired hike date. Applications are accepted online from midnight to 4:00 PM. For example, if you plan to hike on June 14, you would apply on June 12.
Winners are notified later the same evening on the website or via phone the following morning, providing about 36 hours' notice.
It's important to note that unlike the pre-season lottery, the daily permit system issues individual permits only. This means each member of your group must apply separately, and only those who secure a Half Dome hike permit can ascend to the summit.
The National Park Service does not specify the exact number of daily permits awarded but states it is based on estimated under-use and cancellations. It's estimated to be around 50 permits per day.
In 2022, the average success rate for Half Dome daily lottery permits was approximately 30% on weekdays and 18% on weekends. It's wise to approach the daily lottery with the expectation of not receiving a permit, but you never know, which makes any success a pleasant surprise!
PRE-SEASON HALF DOME LOTTERY
The pre-season Half Dome lottery stands out as the most reliable method to secure permits, especially for peak times like summer weekends and holidays. Unlike other options, it allows applicants to select up to six alternative dates, spanning a wider timeframe rather than a single specific day. Winning a permit in the pre-season lottery also increases your chances of securing accommodation in Yosemite Valley, which tends to fill up faster than Half Dome permits themselves.
This lottery takes place annually from March 1st to 31st on recreation.gov, with winners notified by mid-April. The date of application does not affect your odds; entries anytime within the month have an equal chance. Each permit application can list up to six people, requiring a designated group leader and an alternate. The alternate must have their own Recreation.gov account and accept their role within the specified timeframe.
This alternate system allows the group to proceed even if the leader cannot attend. Either the leader or alternate must accompany the group past the ranger checkpoint at Sub Dome, as permits are non-transferable.
When applying, prioritize dates with flexibility to improve your chances. In 2023, 22% of applicants secured a Half Dome permit, with weekdays offering better odds due to fewer applications.
YOSEMITE WILDERNESS PERMITS
Backpackers seeking to hike Half Dome require separate permits for camping and the Half Dome Cables, but they do not apply through the traditional Half Dome lottery.
Instead, you apply for a Yosemite wilderness permit (specifically, a backcountry camping permit) anywhere from 24 weeks to 7 days in advance. This type of Half Dome permit is available as a $10 add-on with a wilderness permit. Essentially, when you apply for a backcountry campsite, you can also obtain a Half Dome hike permit for an additional $10.
Similar to the pre-season and daily Half Dome lottery, you need to specify your start date, group leader information, ascent and descent trailheads, and campsite on your permit application. You can list up to eight options, including various dates and trailheads.
It's important to note that obtaining a Yosemite wilderness permit does not guarantee you will receive a Half Dome hike permit. You may need to apply multiple times with different date and campsite combinations across various application periods to secure both permits.
Wilderness permits are exclusively available for the following trailheads:
Mono Meadow (This is where my group entered)
Cathedral Lakes
Happy Isles to Little Yosemite Valley
Glacier Point to Little Yosemite Valley
Happy Isles past LYV (Donohue Pass eligible)
Rafferty Creek to Vogelsang
Sunrise Lakes
If you’re not utilizing one of the specified trails, you’ll need to enter the traditional Half Dome lottery and apply for hiking permits separately.
PRE-SEASON YOSEMITE WILDERNESS PERMIT RESERVATIONS
During the wilderness permit process for Yosemite, 60% of permits can be secured through the pre-season lottery. The remaining 40% become available online on a first-come, first-served basis, starting 7 days prior to the intended date.
Throughout the year, backpackers require a wilderness permit. However, from May to October, reservations are mandatory, similar to Half Dome permits.
To participate in the pre-season reservation, you can apply exactly 24 weeks in advance. Applications are accepted weekly from midnight PST on Sunday through 11:59 pm Saturday. Successful applicants are notified the following Monday.
Any remaining permits are released 12 days after each weekly application period (Friday, 22 weeks prior to the intended date) and are available until 7 days before the trip date.
WEEK-AHEAD YOSEMITE WILDERNESS PERMIT RESERVATIONS
Seven days before the intended hike date, the remaining 40% of Yosemite wilderness permits are made available through the "week-ahead reservations" system, operating on a first-come, first-served basis.
To secure one of these permits, you can apply up to three days before your hike date. It's crucial to be prepared as reservations typically fill up within minutes. Ensure you are logged into your Recreation.gov account and ready a few minutes before the release time.
The trip leader or a designated alternate must personally collect the wilderness permits at one of the park's wilderness centers the day before the hike, or between 8:00 am and 11:00 am on the day of the hike.
DAY-OF YOSEMITE WILDERNESS PERMIT RESERVATIONS
Last, but not least, any remaining wilderness permits can only be obtained in person at the wilderness centers on the day of the hike. It's important to note that these permits are very limited in availability.

What to Know Before You Go
If you’re one of the lucky one’s who have won a permit for Half Dome, congratulations! Now, it’s time to start preparing. Summiting Half Dome is a challenging endeavor. The trail from Yosemite Valley ascends nearly 5,000 feet over seven miles, and navigating the steep descent is equally demanding. If you choose to summit from a different trailhead and make it a multi-day hike, the ascent is still going to be equally taxing as well.
That being said, with adequate training or prior hiking experience, completing the entire Half Dome trek, including the cables section, is definitely achievable. However, it's crucial to emphasize once more: be fully prepared for a strenuous and lengthy day or days.
HOW LONG DOES IT TAKE TO HIKE?
That depends on your intended route. If you’re like me, you can break it up into a 3 day trek. However, most people opt to do it in a day. If you have a day-hike permit the hike typically spans from 9 to 14 hours, depending largely on your fitness level, hiking pace, frequency of breaks, and any queues at the cables.
Regardless of your anticipated speed, it's advisable to begin your hike as close to sunrise as possible. This challenging trek demands an entire day's commitment. The majority of hikers we met ascending from Yosemite Valley reached the cables around 10 am, which meant they had left the valley well before sunrise. Starting early not only facilitates an earlier arrival at the cables but also reduces congestion, enhancing everyone’s overall hiking experience.


WHEN IS THE BEST TIME OF YEAR TO HIKE HALF DOME?
The best and safest time for average hikers to summit Half Dome is during the period when the cables are installed, typically from late May to early October.
While it is technically possible to reach the summit when the cables are removed, this is strongly discouraged except for very experienced mountaineers with serious climbing proficiency. For those attempting the climb without cables, it's essential to have appropriate climbing equipment such as a harness and carabiners.
Interestingly, despite its challenges, fatalities on Half Dome are relatively low, totaling 20 over approximately the last 100 years, with the majority occurring when the cables were not in place. That said, the day I was there, not long after I descended the cables, I witnessed a very scary fall that could have been far worse had our guide not jumped into action quickly. So, when I say this hike is not to be taken lightly, I really mean it.
It is also good to note, it is best to ascend Half Dome before 12pm because afternoon thunderstorms are common in the Sierra Nevada. Starting early will reduce the risk of being caught in a storm.
WHAT IS THE TRAIL LIKE?
While I didn’t hike Half Dome in the traditional single-day way most people do, I have technically hiked the Mist Trail to Nevada Falls, which is essentially the first half of the route most people take from the Valley floor to the top of Half Dome, so I do know a thing or two about the day hike trail!
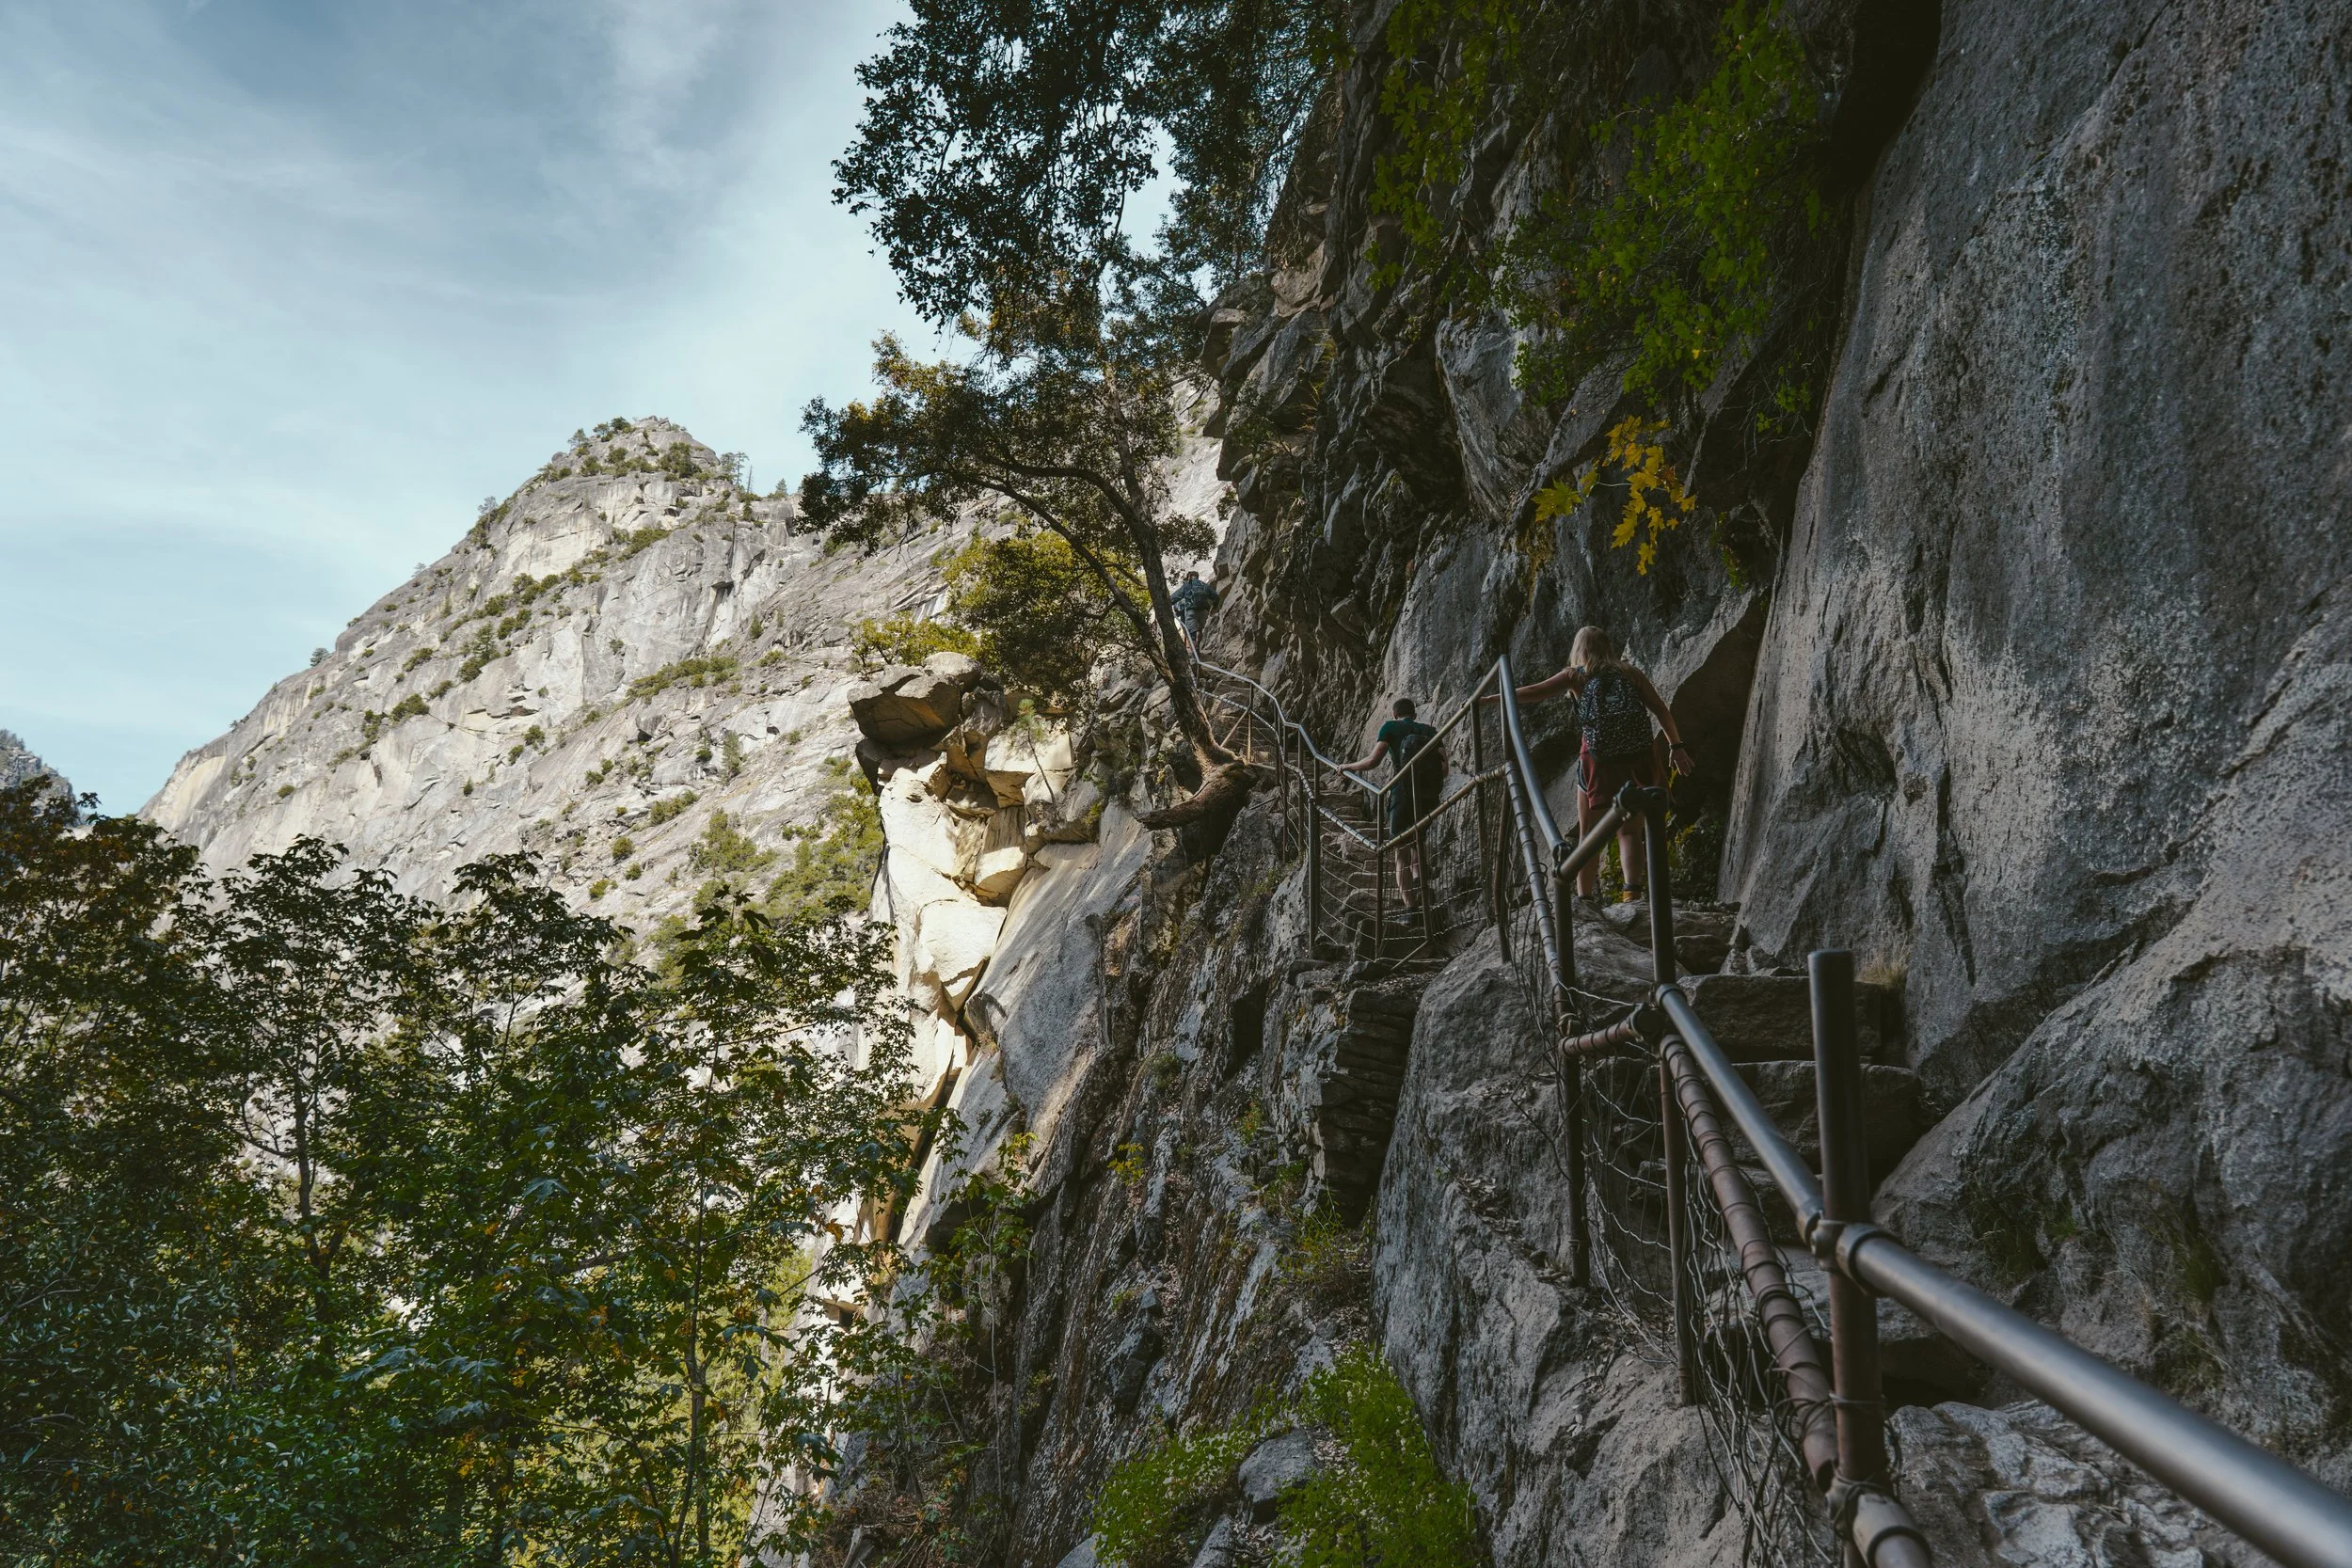
The first section of the hike is along the Mist Trail, an iconic path in Yosemite National Park. It leads you up a slippery staircase of nearly 600 steps alongside Vernal Falls. If you're hiking in the spring or summer, especially after a high snowfall year, you will definitely get wet on this part of the trail. I highly recommend wearing rain gear and being very cautious as you climb, as more deaths have occurred on the Mist Trail near Vernal Falls than on Half Dome itself.


After reaching the top of Vernal Falls, you'll continue upwards towards Nevada Falls, about two miles away. This section of the trail winds through shady forest and up numerous, steep rock steps. There's a pit toilet here, along with signs pointing to a Nevada Falls overlook 0.2 miles away. This is an excellent spot to cool off and take a break for a bit.

For a short distance after Nevada Falls, the trail is pretty flat, which will feel great after all the vertical miles you’ve put in. It meanders for a bit alongside the Merced River and eventually you’ll pass through the Little Yosemite Campground, which has pit toilets—a great last spot to stop if you need a bathroom.
Eventually the trail begins making it’s way upward again, this time through a dense forested area. Although this section isn’t particularly technical, it is an unrelenting climb upwards, with very little to see, and it can be a bit demoralizing after everything you’ve already accomplished.
After about 2.5 miles (6.5 miles total from the trailhead), you’ll reach the base of the Sub Dome. This is where your permits will be checked, and it’s also the final obstacle in your path before ascending the Half Dome cables. Some people feel that Sub Dome is harder, or just as hard as the cables. I will say, I felt the cables were much more anxiety-inducing, but Sub Dome is definitely no joke. The granite on this short .5 mile section of the trail is slick, exposed and at times, tricky to navigate, so it’s important to take your time here (especially on your way down).

Finally, you will reach the crux of your hike, the 400-foot, near-vertical cables to reach the summit of Half Dome. This is where it is important to remember some tried and true techniques that will get you to the top efficiently and safely.
Clear communication with fellow hikers with on the cables is super helpful, particularly when you need to pass. Be patient, kind and calm when interacting with others.
Use the three points of contact system. This means you should always have three points (limbs) of contact with the cables and/or granite. For example, both feet and one hand, or both hands and one foot.
Wear grippy gloves. This may seem silly initially, but your palms will thank you for it afterwards.
REMINDER: If you see a storm clouds or lightning anywhere on the horizon, DO NOT CONTINUE. The top of Half Dome is the last place you want to be during a storm. Just Google “Half Dome Thunderstorm” and you will see plenty of footage as to why…

What to Pack for Half Dome
Half Dome permit, printed and/or downloaded to your phone
Sturdy / grippy hiking boots or trail runners – good ankle support is strongly recommended for hiking Half Dome.
Work / Grippy Gloves - these are ideal for the cables section and will protect your hands and allow you to keep a firm grip on the cables if they becomes sweaty or cramp
Water – a general guideline is to drink about half a liter (0.5 liters) of water per mile of hiking
Water filter – this could come in handy and allow you to carry less water/weight
Sun protection – sunscreen, sunglasses, sun shirt and a hat
Wool socks - backup socks are a plus in case of blisters or if your feet get wet
Headlamp - you’ll most likely be hiking before sunrise
Trekking Poles - your knees will thank you
Packable Rain Jacket / Poncho - if you are heading up the Mist Trail you will likely get a bit wet and want some protection
Extra warm layers - it can be windy or cooler as you reach the higher elevations
Nutritious snacks - choose snacks that are salty or high in calories and protein
Electrolytes - I love having electrolytes on me, especially on hot days
First aid kit - bring the essentials to treat things like cuts, scrapes or blisters
Map - always ensure you have a paper map and a downloaded map to your phone
Bug Spray / Bug Net - the mosquitos are bonkers in the summer months
Backpacking gear (tent, sleeping bag, stove etc.), - if you’re doing a multi day trip
If you have more questions or comments about this thrilling hike, please don’t hesitate to comment below!

